Kroketten

Market sign announcing the "one
and only" Van Dobben Kroket  on
a roll
The most popular posts on this blog tend to be either sandwich-related or fast-food related: the broodjes post scores high, as well as the bitterballen and the frikandellen posts. The latter scores high on a list of its own, the Top Ten of Favorite Snacks (http://snacks.toptien.nl/), and is closely followed by the ultimate deep-fried gravy stick, the meat kroket.

Companies such as Van Dobben and Kwekkeboom, both food establishments in Amsterdam, are famous for their meat kroketten and have been offering this fried delicacy since the mid 1940sEach has their own following, and discussions about which kroket is superior is ongoing. Patisserie Holtkamp, one of the more sophisticated baked goods shops around town, also showcases kroketten, or in their case, croquetten, but has embraced a more varied flavor assortment: veal, cheese, sweetbreads/truffle and lobster. The Holtkamp shrimp croquet is their best-selling item. 

Holtkamp's Shrimp Croquet
Kroketten started as a great way to use up leftovers: Sunday's roast, or meat used to make soups, ended up in the meat grinder, then folded into a creamy thick gravy, after which it was refrigerated, rolled into logs, breaded and deep-fried to a beautiful golden bar. Meat kroketten are usually consumed with a good mustard, either by themself or on a white roll.

The cookbook from the Amsterdam Home Economics School, Kookboek van de Amsterdamse Huishoudschool, in its tenth edition from the 1940s, mentions a variety of croquetten: meat but also potato and shrimp, fish, sweetbreads, cheese and even macaroni. The spelling was fancier (the "c" and "q" were replaced by the more common "k" in later years) which also implied a more sophisticated presentation: according to the book, croquetten were to be deep-fried until golden, stacked in a pyramid-shape and served on a starched napkin with fried parsley for decoration.

Wow. Well, nowadays the meat kroket is usually served in a less charming manner: in a triangular paper cone or simply out of the wall on a paper tray, with no fried parsley or starched napkin in sight. And you'll be hard pressed to find a sweetbread kroket or a macaroni kroket in any of the establishments for supplying fatty foods such as the neighborhood snackbars or Febos.

But let that not stop us! Today we're making meat kroketten. The meat was first used to draw a beef stock for a vegetable soup, then shredded. You can also use leftover roast beef. If all you have is a pound of raw chuck roast or some other simmer meat, place the meat in a saucepan, add eight cups of water, half an onion, two peeled carrots and two chopped sticks of celery. Bring to a boil, then cover and simmer for two hours. Skim the broth, discard the vegetables and cool the meat.

Make sure you bread the kroket on all sides: one small crack and the filling will spill out into the fryer and cause a mess. You can also use this mixture for bitterballen. Once you get the hang of it, experiment with your own flavors. Leftover bbq beef? Go for it. A vegetarian version with a mushroom medley? Awesome! Just because Kwekkeboom, Holtkamp and Van Dobben come up with all kinds of flavors, doesn't mean you can't :-)

Kroketten
1 lb (450 grams) beef, cooked and chilled
1 cup (250 ml) milk or beef bouillon
6 tablespoons flour
1 tablespoon chopped parsley
1/8 teaspoon dried thyme
1/4 teaspoon  ground black pepper
1/2 teaspoon  salt
2 tablespoons (30 grams)  butter
2 eggs
1 cup panko or breadcrumbs

Shred the cooked meat and chop fine in a food processor, or by hand. Melt the butter in a pan, and stir in the flour. When the flour has soaked up all the fat, slowly pour in the milk or bouillon while continuing to stir. The flour will thicken the liquid and turn into a thick, creamy gravy. Stir at least one or two more minutes after the sauce has come together to get rid of some of the flour taste. Now add the tablespoon of chopped parsley, the pinch of pepper and salt and finally stir in the chopped meat. If the gravy is too thin, add another tablespoon of flour. Too thick? Carefully add a tablespoon of milk or broth to the mix and stir.

Spread this meaty mix on a baking sheet or a shallow plate, let it cool for about thirty minutes, then wrap and refrigerate it overnight.

Remove the roux from the fridge. Sprinkle some flour on the counter, divide the mixture into six equal pieces and roll each piece through the flour. Shape into tight logs, approximately 4 inches long and 1 inch wide. Your main concern will be to have kroketten approximately the same size. Wrap and refrigerate, while you prepare the rest.

Place three deep plates in a row. In the first one, put flour, the second one 2 beaten eggs, the third one, one cup of panko or breadcrumbs. Take the kroketten out of the fridge. With your dominant hand, lightly roll the kroket in the flour, then through the egg (make sure you cover the whole surface!) and finally through the breadcrumbs. Check to see that each area of the log is covered. Set aside while you repeat with the rest of the kroketten. Wrap and refrigerate while you heat up the oil.

Heat your fryer oil up to 375F. When it's ready, place one or two kroketten at a time in the hot oil and fry them until golden. This will take anywhere from 3-5 minutes. Take them out of the oil and let them drain on a couple of paper towels to get some of the fat off.

Serve hot. With or without fried parsley or a starched napkin, but do not forget the mustard!

Groentesoep met balletjes


One of the many perks of writing this blog is receiving and responding to emails from readers. Some of you comment on the articles, others reminisce about the memories a dish brings back, and yet others ask for a specific recipe. Soup must be in the air, so to say, as several requested "soep met balletjes", soup with meatballs, this last week.

Holland's cuisine knows many soups, from the sturdy thick split pea soup to a brothy, light, appetite-arousing groentesoep, or vegetable soup, like today's recipe.  A standard item in groentesoep are, besides the vegetables, these so-called soup balls, or soepballetjes. Not the big softball-size meatballs, or gehaktballen, that the Dutch serve for dinner, but bitesize balletjes the size of marbles. 

The meat used for these fleshy globes is "half-om-half", half pork and half beef. The fattiness of the pork makes sure that the meatballs stay juicy and tender, and the beef adds body and flavor. Omas, or grandmas, usually had a "pannetje soep" on the back of the stove, simmering, and many of us associate soup with Sunday afternoon visits to grandma's house. Soup is still a favorite starter for an evening meal or a Sunday lunch, and an easy and affordable dish to feed a family with.

Practically any kind of soup will benefit from these soepballetjes, whether they're stock-based or thick, puréed soups. You may consider rolling enough to freeze so you can have them at hand at any moment. Just a thought!

Today's soup is a simple vegetable soup: use either store-bought bouillon cubes to make the eight cups of stock, or make your own. Select a variety of chopped vegetables (typical Dutch soup vegetables are leeks, cauliflower, carrots and celery) or, if you're in a pinch, even a bag of frozen stir-fry vegetables will do.

Groentesoep met balletjes
8 oz (500 grams) ground pork
8 oz (500 grams) ground beef
1 tablespoon panko or breadcrumbs
1/4 teaspoon nutmeg
1/2 teaspoon salt
1/2 teaspoon ground black pepper
8 cups (2 liters) bouillon or stock
2 cups (depends) vegetables

Mix the meats with the breadcrumbs, the salt, pepper and nutmeg until well blended. Roll small meatballs the size of a marble.

In the meantime, heat the bouillon stock to a slow boil. Add the fresh vegetables and simmer for a good twenty minutes. Put several soepballetjes at a time in the bouillon, wait ten seconds, then add some more, until they're all in the soup. The meatballs are done when they start to float, within a minute or two.

Taste the soup, adjust seasonings as needed and serve warm. This is one of those soups that improves with time, so feel free to make a large pot!


.

Gebakken Peren

"To be left with baked pears" is a typical Dutch saying which indicates you are in trouble, or that you're left holding the proverbial bag. Presumably the expression comes from the Middle Ages, where women sold stewed or baked pears on the street. If they had not sold all their merchandise by the end of the day, they were left "stuck with baked pears".

Whether that's true or not, I am unsure but it's a cute story and I'll go with it. Holland has many sayings that involve food somehow: cheese (laat zich het kaas niet van het brood eten), vegetables (een kool stoven), fruit (met de gebakken peren zitten), or meat (wat voor vlees je in de kuip hebt), beans (boontje komt om zijn loontje), butter (boter op zijn hoofd hebben) and ofcourse bread (de een zijn dood is de ander zijn brood).

I found a recipe for baked pears in an old Albert Heijn cookbook but found the execution a little on the boring side. I tend to follow recipes to a T, especially because I want to make sure I reflect the original flavors, but in this case I allowed myself a little culinary freedom. Baked pears are traditional in the verbal fashion, but are not a typical dish or one with much history. However, for a change, one can be glad to be left "stuck with baked pears"!

Gebakken Peren
3 large pears, firm (I used Bartletts)
3 tablespoons of butter
1 cup of sugar, divided
1 cup of water
1 tablespoon of panko or unseasoned breadcrumbs
1 tablespoon of vanilla flavoring
 2 tablespoons of chopped hazelnuts

Wash and cut the pears in half, don't remove the stem nor peel the fruit. Melt the butter in a skillet and place the pears cut side down. Fry at a low temperature until the pears are golden on the cut side, about ten minutes. Place the pears, this time cut side up, in an oven dish, sprinkle with a tablespoon of sugar and panko and bake for twenty minutes at 350F.

In the meantime, let the butter in the skillet cool a little bit, then add the rest of the sugar while stirring and carefully add the vanilla and the water. Be careful that the sugar has absorbed the butter before you add the water, otherwise it will cause lots of splattering and may cause burns! Stir over heat until the sauce thickens and caramelizes, add the hazelnuts and take off the stove.

Place the pears under the broiler so that the breadcrumbs can brown. Take one pear, place it on a plate and spoon the hazelnut caramel sauce over it.

I served the pears with hangop: 16 oz of plain yogurt is left to drain in a moist cheesecloth in a colander over a bowl for 24 hours. Stir the remaining creamy yogurt with a tablespoon of powdered sugar, just enough to take the sour edge off the dairy, and whip for several beats to incorporate some air into the yogurt. This is called "hangop" or "hangup" in Dutch and is an old-fashioned dessert.

Boterkoek

Boterkoek has a distinct pattern
pressed into the dough
with the tines of a fork
Some days are just better baking days than others: a couple of days ago I had planned on baking a hazelnootschuimtaart, a hazelnut meringue cake. But with one thing and another, things got busy and I wasn't going to have time to make an elaborate cake for the company I was expecting later that day. Thankfully, the Dutch kitchen has so many cookie, cake and pie recipes that I never lack for ideas. In this case, I turned to plan B. As in Boterkoek, an alltime favorite.

The Dutch Buttercake consists of hardly anything else than butter, sugar and flour. Just for giggles, lemon zest, salt and vanilla is added, but the main ingredients are those three key players in the Dutch baking world. Buttercake is just like it sounds: a dense, buttery, sweet cake that sticks to your ribs. And there's nothing wrong with that!

Do make sure all the butter is incorporated into the dough, or it will leave small airpockets in the cake as the butter melts. It's not going to make it taste any different, but it just looks better.

Boterkoek is usually baked for fifteen minutes, but it's one of the trickier cakes to gauge when it's done. As soon as the top starts to color and the sides are slightly dry, it will be ready: you want the inside to still be fairly soft but baked. If you bake it too long, the taste will still be good but the cake will be dry and dense. Nothing wrong with that, and everybody likes their boterkoek a certain way, so you will just have to give it a try and see. Fifteen minutes usually does the trick, but if the middle is still wet, bake it a little longer. After you pull the cake, it's cooled and cut into small squares or narrow slices. It really doesn't lend itself too well for large pieces: it is a heavy cake that is best eaten in small amounts. It can be baked in its original form, or filled with amandelspijs (divide the dough in half, press one half in the pan, spread the almond paste, then cover with the second half of the dough).

Boterkoek
2 sticks of cold butter
2 cups of flour
3/4 cup of sugar
1/8th teaspoon salt
2 eggs
1 vanilla bean
Lemon zest from one lemon

Mix the flour with the sugar, the salt, one egg, the seeds of the vanilla bean and the lemon zest. Cut in the cold butter, then knead the dough until it all comes together. If the dough gets too sticky, wrap it in plastic film and refrigerate it briefly.

Butter a 9 inch pie form, pat the dough into the pan and make sure the top is even. Make markings with a fork as in the first picture, beat the second egg and brush the top of the cake with it, then bake in a 350F oven for about 15 - 20 minutes. Keep an eye on it, and as soon as the sides begin to pull away and toast, it's ready.

Let the cake totally cool before cutting it into narrow slices or squares.


Hangop

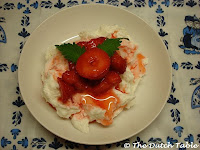
Hangop on plate with fresh strawberries
Hangop literally means "to hang up". It's an old fashioned Dutch dairy dessert made with buttermilk or yoghurt that's left to drain, hanging, in a towel over a colander; hence the name. The whey is drained, and the remainder of the milk is now a thick, creamy dessert, somewhere between thick cream and creamy yogurt.

Sweeten it with a tablespoon or two of sugar and honey, or just leave it tangy as it is, however you like it, it's fine. I prefer to serve mine with fruit, such as stewed strawberry-rhubarb, stoofpeertjes or just plain fresh fruit. Today, I cut up several ripe strawberries, tossed them with a little bit of sugar and let them rest for an hour or two.

To make the hangop, you'll need a colander, a tea towel, a bowl and plenty of time. Hangop can be made out of buttermilk or yoghurt alone, but the creamiest hangop comes from combining the two. Save the whey for bread baking or a refreshing summer drink.

Hangop
Hangop in blue towel
1 quart (1 liter) full-fat cultured buttermilk
1 cup (250 gram) plain yoghurt with active cultures

Warm the buttermilk in a pan on the stove up to 110F (43C). Stir in the plain yoghurt, bring it back up to 110F (43C), then cover with a cloth and set it aside, overnight. The next morning the buttermilk should have thickened considerably. Moisten a tea towel, drape it over a colander and place the colander in a bowl. Carefully pour the buttermilk into the towel. The whey, a light yellow-greenish watery liquid, will almost immediately drip through the towel. Now you can either tie the four ends of the towel together and suspend it from, for example, a kitchen cabinet door knob, or just leave it in the colander. The whey will continue to drain.

After four hours, carefully lift the towel with its contents and slightly squeeze out the rest of the whey. Open the towel and move the hangop into a clean bowl with a spoon. You should have a very thick creamy yogurt!

Stir in your sweetener of choice and see if it's creamy enough. If too much whey drained, you can stir in some whipping cream or some milk, one tablespoon at a time. Enjoy!!

Plate with fresh hangop and strawberries