Showing posts sorted by date for query bread. Sort by relevance Show all posts

Fries Suikerbrood (Fryske Sukerbole)

Frisian sugar loaf slices
Sûkerbôle 
or suikerbrood, sugar bread,  is a traditional bread from the northern province of Friesland, in Holland. Other provinces such as Limburg and Brabant have a similar recipe for sugary bread loaves but what sets the Frisian bread apart is the high amount of sugar. In comparison to other regional recipes, Frisians use twice as much sugar. It's therefore a sticky, sugary loaf, but oh so delicious! 

The sûkerbôle was often given to a new mother to celebrate the arrival of a baby girl; for baby boys, it was a raisin cake.

The sugar used for this recipe is called pearl sugar and is hard to find in a regular store, so I order mine from Amazon (here's the link)* Crushed-up sugar cubes are a good substitute: put them in a clean towel, fold it over, and give it a few whacks with t with a rolling pin. Not too hard! You want to have sugar lumps, not finely ground sugar. Handfold these lumps in the dough after the first rise.

Fryske Sûkerbôle
2 teaspoons dry active yeast
3/4 cup + 1 tablespoon (200 ml) milk
3 1/2 cups (500 grams) all-purpose flour
1 teaspoon kosher salt
3 tablespoons ginger syrup (optional)**
1 egg
5 tablespoons (80 grams) butter, melted
1 tablespoon ground cinnamon
1 cup (150 grams) pearl sugar, or crushed sugar cubes

For the pan: 
2 tablespoons butter, melted
1 tablespoon regular sugar

Add the yeast to the warm milk. In a mixing bowl, mix the flour with the salt. Pour in the milk and yeast and mix together. Knead in the ginger syrup if using, the egg, and the melted butter until the dough forms a soft and flexible dough. This will take a little while, as the dough at first seems scraggly, about a good ten minutes. Cover and rise until double its size.

On a lightly floured counter, roll out the dough in a rectangle (about the length of the pan) and sprinkle the cinnamon over it, and then the pearl sugar. Now roll the dough into a loaf shape (first fold the sides towards each other, covering the sugar and cinnamon, then roll up into a loaf). Some of the pearl sugar may fall out - just roll the dough over it so it gets embedded on the outside. 
Sugar and cinnamon filling

Butter the inside of a 9 x 5 inch (23 x 13 cm) loaf pan with the melted butter, but save a little bit for the loaf itself, about half a tablespoon. Put a tablespoon of sugar in the pan and tilt it forward towards each side so that the sugar coats the whole inside. Place the loaf inside, seam down. Cover and rise for about 15 minutes, or until loaf peaks out from inside the pan.

In the meantime, heat your oven to 375F (190C) degrees. Bake for 30 minutes or until loaf is done (measure with a digital thermometer: look for 190F or 87C). If the top browns too quickly, tent the loaf with aluminum foil.

As soon as the bread comes out of the oven, brush the top with the leftover melted butter. Cool the loaf for about five minutes, then carefully loosen the bread from the pan as some of the sugar may have caused the bread to stick. Remove the loaf and continue to cool on a rack. If you want a supersticky loaf, put the bread in a plastic bag when it's still lukewarm. 

Awesome with a curl of real butter!


Buttered sugar loaf on a plate


* this is my Amazon associate's link. If you purchase something through this link, I will get a few pennies (literally) at no cost to you. All the proceeds are used to maintain this website.

** If you don't have ginger syrup, don't worry. I soak a tablespoon (10 grams) of chopped candied ginger and one tablespoon of sugar in two tablespoons of hot water. Let sit for about a good hour, then remove the ginger and use the syrup. Or....if you like ginger as much as I do, add the chopped pieces to the dough. What's the worse that can happen? Exactly. 

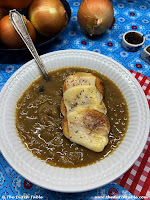
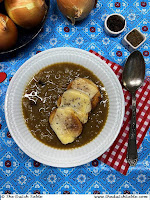
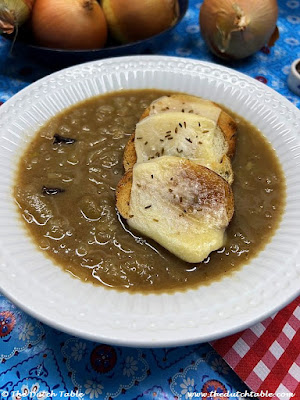
Friese Uiensoep (Fryske Sipelsop)

The Frisian language is such a unique language, and so different to Dutch. Just look at the name of this dish. Ui, meaning "onion" in Dutch, and "sipel" meaning the same thing in Frisian. Where do these differences come from? Well, I am glad you asked! According to the etymology of the words, "ui" has its origins in the French language, "oignon", where also the more old-fashioned word "ajuin" comes from, another Dutch word for onions. In Friesland, however, they veered more towards the Germanic side of things, hence "sipel" which stems from "zwiebel", the German word for onion. 

Fortunately, the soup doesn't care where the words come from, as it's as tasty made with "uien" as it is with "sipels". This is a thicker soup with a slight tangy flavor, and warming qualities: perfect for this cold weather we're experiencing here! The traditional cheese used for the toasted bread slices is Frisian cheese, a delicious gouda-style cheese flavored with cloves and cumin seeds. If you have access to it, great! If you don't, which is most likely, I've adapted the recipe so that you have the same flavors. 

Use a heavy bottomed skillet to caramelize the onions. Caramelizing the onions is a task of patience - browning the onions is slow, but it's so worth the effort as it gives a great color and fantastic flavor to the soup. I use this time to listen to Dutch radio or TV: it's a great distraction!

Friese Uiensoep

2 lbs (1 kg) onions, peeled and sliced in half moons
2 tablespoons (30 grams) butter
1/4 cup (50 grams) flour
4 cups (1 liter) vegetable or beef stock
4 cloves
2 tablespoons of Worcestershire sauce (optional)
Black pepper
Toasted bread rounds or croutons
2 oz (50 grams) Gouda (-type) cheese, grated
Pinch of cumin seeds
Salt

Melt the butter in a heavy bottomed skillet until hot, and stir in the onions. Keep stirring frequently, until all the onions are golden brown. This will take at least a good 20 to 30 minutes on medium low heat. When they're golden, sprinkle the flour over the onions and give it a good stir so that the onions are coated, and continue to brown for a minute or two. Stir in the stock a little bit at a time, making sure that it's incorporated well, until it's a thick soup. Add the cloves and simmer for about twenty minutes. Season with salt and pepper to taste. Remove the cloves and stir in the two tablespoons of Worcestershire sauce (optional). 

Top the bread rounds with grated cheese and melt the cheese under the broiler (I give it a quick 30 seconds in the microwave if I don't want to heat up the oven). Add a pinch of cumin seeds on top and serve with the soup. 

Serves 4. For a more substantial meal, dice a hardboiled egg and stir in the soup, right before serving.


Happy Easter!

It is amazing to me how fast time goes. It seems only yesterday that I was getting ready for our family Easter brunch, and here we are again. A year further, perhaps a bit wiser, but definitely a year older! 

The Dutch Table's Paashaasjes
The Netherlands celebrates Easter in a similar way as it does Christmas, spread over two days. In the case of Easter, First Easter Day is always on Sunday, Second Easter Day is on the Monday following and is often a holiday.

The gathering of family and friends around the breakfast, lunch, or dinner table is key on First Easter Day. Stores are closed, children are dressed in their "Paasbest" (Easter Best) with new clothes and shoes. Eggs are colored, hidden and if lucky, all found. The breakfast or brunch table will be laden with different types of bread (multigrain, tiger rolls, Easter breads). To the right, you see our own traditional Paashaasjes, Easter bunny rolls, but you can always come up with your own design! 

The breakfast or brunch table will also have various bread toppings, deviled eggs, a couple of warm or cold egg dishes, and large amounts of coffee. Lamb is a traditional dish served for Easter.

And if you're skipping brunch or have friends and family over for coffee or tea later, you can also serve something sweet: a Paastaart, or Easter cake, a variation on our traditional slagroomtaart, whipped cream cake. Decorated with fluffy whipped cream, a light biscuit batter and an adult amount of advocaat, this Easter cake will put a smile on your face. 

Have a wonderful Easter weekend! 

Nicole

I've listed the recipes below as well:

Bread/Brunch:
Paastaart, Easter Cake


Coffee Time:

And there are many, many more recipes - it doesn't have to be egg or Easter-related to be good! 

Kaneelbeschuitjes

There is this sweet memory I have from my early teenage years. Every day, my mom would have a hot pot of Pickwick tea waiting for me when I got home from middle school. The fact that I made it home was a feat in itself: five miles one way, on my bike, with the wind in my face, I had to cycle from the house to a neighboring town, along a dark bicycle path, with tall, looming trees on both sides. It was always dark under those trees, no matter what time of day. Early mornings, and late afternoons when I returned, I always had that darn wind in my face, which made the 5 miles feel more like 10. Every push of the pedal with my stubby little legs was an effort, and all that kept me going was that golden pot of tea on the table, with a small tealight underneath it to keep it warm, and a plate of cookies. Not too many, mind you, just a few to enjoy while I drank my tea and made my homework, but that promise of comfort and warmth kept this 11 year old little girl cycling "through weather and wind", as we say. 

Our household traditions are not unique, of course. About 40% of the Dutch drink on average about 3 cups of tea a day, adding up to well over 25 gallons a year. Not usually with milk, like our British neighbors do, but plain or sweetened with sugar, and usually served in a glass mug. Tea also prefers a different kind of cookie: because of the gentle flavor of the tea, we tend to go for lighter cookies that combine well and don't overwhelm the delicate tea taste. These cookies are not too heavy on the chocolate, or overly spiced or flavored, and are usually called "thee biscuitjes", tea cookies, where biscuit, or biskwie, refers to a hard-baked cookie. And if they dunk well, even better! 

One of our tea cookie favorites are "kaneelbeschuitjes", cinnamon rusks, slender long crisp cookies with a delicious topping of sugar and cinnamon. Originally, the bakeries fabricated these cookies from leftover white bread - we're so frugal! Nowadays, these cookies are made from a sweet yeasted dough that is baked in a shallow, long shape and then sliced, sugared and baked again, in a warm oven. The word "beschuit" is from the Latin "bis coctus" and is related to the Italian word "biscotti" - twice baked.  

I tend to make them the old-fashioned way, with leftover bread. I've found that those so-called Italian loaves are a great resource, but any unsliced white bread with a thin crust that you can find will do. 

Because these Italian loaves are domed, I put a baking sheet and a heavy weight on top for 24 hours, to flatten the loaf down to approximately 1.5 inch (somewhere around 3 1/2 cm) tall. For the Italian loaves that I buy here, in the US, I need a ten pound bag of flour to bring down the weight. Start out with a lower weight for your loaf as it may not need as much, and slowly increase the weight if you notice resistance. If you put too much weight on it from the start, or if the loaf is very fresh, it might just flatten into a pancake and we will not be able to use it for these cinnamon rusks!

Kaneelbeschuitjes

1 loaf Italian (or other white) bread, unsliced

3 tablespoons sugar

1.5 teaspoon ground cinnamon

1/2 cup milk

Slice the flattened loaf into 1/2 inch slices (approx. 1.5 cm) Reassemble the bread on a baking sheet, balance another baking sheet on top and place the whole thing in the oven on the warm setting, or up to 200F (about 95 to 100C). This will help to start drying out the bread a little bit and set its shape.

Pour the milk in a flat bowl, and mix the sugar and cinnamon in another. Dip each bread slice quickly with one side into the milk and then dip that wet part in the cinnamon sugar mixture. Place the bread slices on a parchment or silicone lined baking sheet, sugary side up. 

When you've covered all the slices with sugar, put the sheet pan back into the oven for a minimum of 2 hours, but no longer than 4. Depending on how thick you sliced, or how long you dipped the bread, it might take a bit longer to get that typical rusk crunch. 

One regular Italian loaf makes about 15 - 18 kaneelbeschuitjes


Abrikozenvlaai

One bite of apricot tart wooshes me straight back into my grandma's, oma's, kitchen. We grew up in the south of the Netherlands, in the province called Limburg, where vlaai (pie, or tart) is a regional tradition. All kinds of fruit tarts: cherry, black plum, apple crumble, pear, gooseberry or the so very traditional "butter vlaai"- you name it. During birthdays, holidays, or just regular Sundays it was traditional to have a variety of them laid out for when people came to visit - and my pick was always, always, apricot tart. The sweetness of the jammy fruit, the slight tang at the back of the tongue and the crunch of the sugar on the lattice was for me the perfect combination. Many Sundays I sat at my oma's elbow, pinching off small pieces of tart with my little fork and wrinkling my nose and happily shudder every time the tang hit me. It always made her laugh! 

October 25th is National Vlaai Day, the day to celebrate this fantastic, yet so simple, traditional Limburg pie, and as of 2024, the vlaai has gained official recognition as a protected regional product by the European Union. I've spoken about the history of the vlaai frequently, because to me it is such a great example of how out of little, like our country*, much can be made: the vlaai started its humble beginnings as a piece of leftover bread dough, rolled out flat and baked with a bit of fresh fruit or jam, and eaten while waiting for the bread to finish baking in the oven. 

So what keeps you? If you have flour, yeast, sugar, an egg, a bit of butter and some fresh fruit or preserves around the house, whip up a vlaai or two to enjoy this weekend, or share a "stökske vlaaj" (slice of vlaai) with family and friends, and celebrate with us! 

Abrikozenvlaai
For the vlaai:
1/3 cup milk and 2 Tbsp (100 ml), lukewarm
1 1/2 teaspoons (5 grams) active dry yeast
1 3/4 cup (250 gr) all-purpose flour
2 Tablespoons (30 grams) sugar
1/2 teaspoon (4 grams) salt
1 egg
1/2 stick butter (55 gr), soft at room temperature
2 tablespoons breadcrumbs or panko
1/2 cup (50 grams) sliced almonds

For the filling:
4 cups (750 grams) sliced fresh apricots (or canned and drained)
1/2 cup (100 grams) sugar
1 heaping tablespoon cornstarch
1 tablespoon lemon juice (when using fresh fruit only)

Dissolve the yeast in the warm milk, and let it proof while you measure out the rest of the ingredients. Add the flour to a mixing bowl, sprinkle the sugar and salt on top and give it a stir. Now pour in the milk with the yeast and start mixing. As the dough comes together, add in the egg and a bit later the soft butter and let the whole mixture come together while you need it into a soft dough. (You may need to add a tablespoon or two of milk in case the dough turns out to be a bit dry).

Form the dough into a ball, put it in a bowl, cover and let it rise, about a quarter to half its original size.

In the meantime, make the filling. In a bowl, mix the cornstarch with the sugar and toss the apricots in the mixture. Also add in the lemon juice if you use fresh fruit, to keep it from oxidizing. As you can tell from the picture, I forgot and some pieces turned a little brown. It doesn't affect the flavor, it just looks a little "off".

Punch down the dough, and roll it into a circle large enough for an 11 inch (28 inch) shallow pan. Spray or butter the pie pan. Press in the dough, cover with cling film and let it rise a second time, about 20 - 30 minutes, until fluffy. Dock the dough with a fork and prick little holes all over, letting the air out. Spread the breadcrumbs evenly over the dough. Apricots can be quite juicy sometimes and the breadcrumbs will absorb some of that moisture and keep the bottom dry.

In the meantime, heat the oven to 400F/200C. Spoon the apricot slices into the pan. Bake in the hot oven for 25 - 30 minutes. Add the almond slices to a baking sheet and toast them lightly in the cooling oven (keep an eye on it!), or give them a quick toss in a frying pan, just for a bit of color and increased flavor. 

Sprinkle the almonds around the rim of the vlaai right before serving. 


*Almost 20% of the country is man-made, or reclaimed land from the sea.

Knapkook


There is something inherently attractive about simplicity: are we not able to recall with much more pleasure the flavors of a home cooked meal instead of a luxury dinner, the pure taste of good cheese, the sweet acidity of a sun-kissed tomato fresh of the vine? Perhaps too, when we have to do with less, we can hopefully still enjoy the things we do have, or are able to obtain, with equal pleasure.

It is not often that I wax philosophical about the shortcomings in life, but this week's cookie reminded me of how the best baked goods benefit from just a handful of simple ingredients. A simple sponge cake is just eggs, sugar and flour. A good bread should consist predominantly of flour, water, salt and yeast. And so too this traditional Limburg cookie, the knapkook: butter, flour, sugar, egg, and a pinch of baking powder to lighten it up is all it needs. Quality ingredients, mind you, but still just the very basics of baking.

My grandfather Tinus loved all things sweet but had a special preference for cookies, or pletskes, as they were called in the Venlo dialect that he grew up speaking. He enjoyed them in moderation, but his eyes lit up if there was the prospect of a cookie with his afternoon coffee. His favorite cookie was the knapkook, best translated as "snap cookie". It is a cookie typical of Limburg and part of Belgium (Maaseik in particular): crisp and sugary, it makes a satisfying snapping sound as you break it in two. These cookies are fairly large, measuring a good 4 inches across.

Just like with so many recipes that are handed down from generation to generation, you can make these as fancy as you like: add a teaspoon or two of hazelnut liqueur to the dough, mix a pinch of cinnamon in with the flour or with the sugar on top, or brush it with strong coffee instead of egg. If you don't have a 4 inch round cookie cutter, make smaller ones, or cut them into diamond shapes. Today, I baked the most basic version - and sometimes, basic is good enough.

Knapkook
2 cups all-purpose flour (250 gr)
3/4 cup sugar (150 gr)
1 stick and 2 tablespoons butter (150 gr), cold
1 heaping teaspoon baking powder (5 gr)
1 egg
Pinch of salt if butter is unsalted

For topping:
1 egg
1/2 cup coarse grain sugar (100 gr)

In a bowl, cut the cold butter into the flour, sugar and baking powder, until you have pea-sized pieces of butter. Add the egg, liquor or a different flavoring if desired, and knead the contents of the bowl into a dough for a good four to five minutes, until it comes together and holds it shape. The dough should not be too sticky. Form into a log, wrap with plastic foil, or place it in a container, and
refrigerate for an hour.

Remove the dough from the fridge and let it adjust to room temperature to become pliable. Cut off a piece of the log, and roll it thin, about 3mm or 1/8 of an inch. Carefully remove the cookies from the counter and place them on a baking sheet lined with parchment paper.

When all the cookies are cut, brush them with beaten egg and sprinkle coarse sugar on top. Bake in a 425 degree oven for about 8 minutes until they're golden brown, not pale. Pull the parchment paper with the cookies onto a rack and let it cool - the cookies will harden. These can be stored, when cold, in a biscuit tin or cookie tin.

Makes approx 25 cookies.


Hemelse Modder

Today, we're making a traditional chocolate dessert that comes with a unique name. Hemelse modder, heavenly mud, is a name that evokes images of cute little piggies rolling around in unctuous, chocolatey pools of sweet sludge, chocolate clay, divine dirt....you get my drift. Or maybe that's just me :-) but let's face it: don't those two words sound at least intriguing and worth exploring, spoon in hand?

Chocolate, in its many forms, is no stranger to the Dutch. It is rumoured that the Spanish Duke of Alva introduced chocolate to the Netherlands, during his stay from 1566 to 1573. At the time, it was only consumed as a beverage which the Dutch called "seculatie", and served in coffee houses. 

But chocolate never really left once it arrived, and although surrounding countries like England, France and Germany pioneered the implementation of the cacao bean into other products, Dutch merchants controlled virtually the entire trade in cocoa beans. Amsterdam developed into the most important cocoa port in the world and several well known chocolate companies, such as Blooker and Van Houten got their start during these times. 

This last one, Van Houten, made an extremely significant mark in the global chocolate history. In 1815, Dutch chemist Coenraad van Houten introduced alkaline salts to chocolate, which reduced its bitterness. Not satisfied with that development, a few years in 1828, he created a press to remove the natural fat (cacao butter) from chocolate, which made chocolate both cheaper to produce and more consistent in quality. This innovation introduced the modern era of chocolate. Known as "Dutch cocoa", this machine-pressed chocolate was instrumental in the transformation of chocolate to its solid form. 

With such an important role in our own economy, and that of the world, it is no surprise that chocolate in its many forms plays an important factor in our food history. We have chocolate for breakfast, in the form of hagelslag, chocolate sprinkles, or chocolate paste on our morning bread, a cup of hot chocolate to warm us up during cold skating days, and chocolate vla for dessert after our warm evening meal. And that is without mentioning bonbons, chocolate bars, candy bars and many other candies and confectionery that includes chocolate. Who doesn't look forward to the chocolate letter in their shoe for Sinterklaas? According to Forbes, the Dutch consume at least 10 lbs of chocolate per year, right above Americans who clock in at 9.5 lbs a year.

Which brings us right back to our recipe: hemelse modder, chocolate mousse. It's a rich, creamy dessert that can often be found on the dessert menu of Dutch restaurants, or made at home for special occasions. The traditional recipe calls for egg whites and egg yolks to be mixed in with melted chocolate. Delicious...but also a bit of a health hazard, as the eggs are not fully cooked. This recipe omits the eggs and uses whipping cream instead - and is surprisingly light, moussy and chocolatey. And best of all, it will be safe to eat!

Once you've made it and tried it, see if you can make it your own: add a splash of vanilla, maybe some cinnamon, or a pinch of chili. It's good by itself but there is no reason why you can't personalize it. Have fun! Makes approximate four cups of mousse.

Hemelse Modder
2 cups (472 ml) heavy whipping cream, divided
8 oz ( 225 grm) semi-sweet or dark chocolate
2 tablespoons sugar (or more, if you like it sweeter)
Raspberries or other fresh fruit, optional

Slowly warm half of the heavy whipping cream with the chocolate on the stove, stirring, until the chocolate is just melted. There is no need to bring it up to high heat, just warm will be enough to melt the chocolate.

Set aside to cool. When it's cold, whip the rest of the cream with the sugar until stiff peaks form. Carefully fold the cold chocolate mixture into whipping cream, trying to not loose any air. Slowly pour the mixture into serving dishes (you can also use mugs, bowls or glasses), cover each one with plastic wrap or cling film and return to the fridge to set up. It should take about an hour and a half, to two hours, to set up.

Decorate with a dollop of whipped cream, fresh fruit or chocolate sprinkles, whip out your favorite spoon and enjoy!!!!


Zalmtaart

Today, March 14th, is Pi Day. I usually pay little attention to all these "Today-is-Fill-In-The-Blank-With-A-Food-Name-" days. Should not every day be pie day?!  So, initially I had not planned to write about this mathematical merriment, until I realized there was a Dutch connection. If the pie part did not catch my attention, the Dutch link surely did. Read on!
  
So, the first calculation of  π was carried out by the Greek mathematician Archimedes somewhere around 250 BC, who determined it to be 3 and a little bit after the comma, more accurately speaking "less than 3 1/7 but greater than 3 10/71". Over the next several centuries, other digit crunchers added more numbers to his initial calculation. 

The big breakthrough happened in 1600, when Ludolph van Ceulen calculated the first 35 digits of  π. This mathematician and fencing instructor, a German-born Dutchman, spent most of his life calculating the numerical value of the number pi, and even having it named after him (Ludolphian number), and writing papers and books about it. His amazing 35-digit approximation to pi is even engraved on his tombstone in Leiden. 

How interesting is that! Not having enough to do with calculating numbers, raising kids and teaching fencing, Van Ceulen also spent time posing problems and solutions to other mathematicians. One of these challenged peers was called Goudaen (meaning from the city of Gouda), of which you can read more here.  

So while I was trying to figure out who this Goudaen is, I was distracted by something else. It appears that the city of Gouda happens to house the oldest herberg, or inn, known in the provinces of South Holland. The hotel is called De Zalm (The Salmon). It was established in 1522 and back then was called De Ouden Salm. It had a gilded salmon on the top of its roof that blew off during a storm but that has been restored to its former glory since.

Never mind the salmon....imagine my surprise when I learned that Kralingseveer, by Rotterdam, housed the busiest and largest salmon auction during the 1800s and 19th century. Apparently, our rivers were riddled with salmon during that time! Who knew?! After the industrialization, the rivers in the Netherlands became too polluted and the salmon pretty much disappeared, which was around 1890. The fish auction at the Kralingseveer was finally demolished in 1932 because there was no more salmon to auction off. Sad, sad, sad state of affairs.

So in honor of Pi day and as a tip of the hat to Ludolph van Ceulen I am celebrating with a warm, fishy salmon pie for lunch. It's different from Aaltje's recipe from 1857 which used pistachios and fresh salmon. Our salmon pie used to be an easy-to-make, safe standby for many long study nights during my college years, and was typical fare for many of us surviving on a budget during those years. Nowadays, it has practically disappeared from the student's culinary scene, much like the salmon from the rivers. Which is a shame really, it's worth a shot! Some people add pineapple and corn, but I prefer this rather simple approach. 

Zalmtaart is also good eaten cold for lunch, with a glass of cold milk.  

Zalmtaart
1 can of pink or red salmon (14.75 ounces)
1 package Boursin cheese with garlic and fresh herbs (5.2 oz)
1 small shallot
1 tablespoon bread crumbs
3 tablespoons red and green pepper dice (or small can of Southwestern corn)
3 eggs
1 sheet puff pastry
Fresh parsley

Drain the salmon and break the meat into big pieces, picking out the skin and bones. Beat eggs with half of the cheese. Chop the shallot and fold into the eggs. Roll the thawed puff pastry out in 9 inch pie form, poke holes in pastry with a fork, and cover with 1 tablespoon of breadcrumbs or panko. Distribute the salmon chunks over the bottom, and pour eggs on top. Break the rest of the cheese over the egg. Lastly sprinkle the bell peppers on top, or the drained corn if you're using it.

Heat the oven to 400F and bake the salmon pie in 20 minutes until done (the egg will be solid). You may finish it under the broiler to add some color to the top. Sprinkle with freshly chopped parsley just before serving. 

Makes 8 slices. 


Chocoladeletters

The early days of December always hold much joy and excitement in the heart of the Dutch, old and young - it is Sinterklaas time! A full twenty days ahead of Santa Claus, on December 5th, Sinterklaas delivers presents and goods to all, and the days are filled with plenty of sweets. This is the time of year when you may get speculaasbrokken or a piece of banketstaaf with your cup of coffee, or if you're really lucky, a piece of gevulde speculaas!

Sinterklaas time is also the time that the children get to "set" their shoe by the fireplace or backdoor. The shoe is filled with straw and a carrot for the horse Amerigo, and often has a written letter to Sint with a request for presents. The shoe is always set out right before going to bed. As you can imagine, the next morning is a mad dash to make it to your shoe first, so that you can see what Sint or Piet have left you in return! It's often a small token - a mandarin orange, a small gift or, if you're lucky, a chocolate letter.

In the old days, according to this source, gifts would be covered with a sheet, instead of individually wrapped. A letter made from bread would indicate what presents would be for which child. Later, these letters became chocolate letters and can still be found in all the letters of the alphabet, so that there is a letter for everybody.

The most popular letter is the letter M, not in the least because the perception is that it has the most chocolate....but one look at the weight of both an I and an M reveal that both letters hold exactly the same amount of chocolate. For some reason, the facts don't matter: an M still seems like a better deal than an I!

For those of us that live abroad, it can sometimes be difficult to find chocolate letters so that we can continue the tradition with our families, or the stores we order from have run out or don't have the letters we need anymore. So let's make our own!

Making your own chocolate letters* is really very easy: all it takes is chocolate, a little bit of butter ( 1 oz per 4 oz of chocolate) and all the sprinkles and edible cake decorations you can find. It would be a great afternoon activity to do with the kids and let them decorate their own letters.

Chocolade letters
For approximately 8 small letters
Chocolate, 1 lb (500 grams)
Butter, 4 oz (250 grams) (room temperature)

Melt 12 oz (375 grams) of chocolate over a pot with warm water, or in the microwave, but be careful to not overheat or burn the chocolate. Dark chocolate should not surpass 118F (48C) and milk chocolate should not get hotter than 113F (45C). Remove the pot from the heat and stir the remainder of the chocolate into the melted chocolate to bring down its temperature to between 86F and 88F (30 to 31C). Be careful to not have any water or steam get to the chocolate - it will seize up. (More info on tempering chocolate here).

When all the chocolate has melted, whip the butter airy and fluffy until it turns white, then stir in the chocolate. Place a piece of parchment paper on the back of a baking sheet, and tape it down. Slide your printed letters under the paper. Prepare a piping bag with a star tip, and fill the bag.

Now pipe the letters onto the parchment paper. You can pipe high or double for thicker, higher letters, or do a single pass. If you don't like how you piped it, you can remove the chocolate and add it back to the bag. If the chocolate spreads too much because it's still too warm, put it back in the bag and wait a little bit longer.

You have a bit of time before the chocolate starts to set. Decorate the letters with edible glitter, kruidnoten or chocolate chips for the kids, or go for grownup flavors like a dusting of chili powder, pistachios or sea salt. Place the letters, after they're done, in a cool area to set up: it will take about two hours. You can then wrap them, or eat them :-)


*The easiest letters to pipe are the S and the O, but if you're adventurous or experienced, definitely try different shapes. I printed out the letter S in Calibri font at 520 points so that it would match the traditional small chocolate letter of 4.5 inches by 3. The large letters measure 6 x 4 inches. 

Pruimenvlaai

"Aan een boom zo volgeladen mist men vijf, zes pruimen niet" wrote Hieronymus van Alphen, the known Dutch poet, pointing out that "on a tree so richly filled five, six plums will not be missed". That must be what the squirrels are thinking as, each day upon return from work, I find half-eaten, half-buried plums in my gardens. The tree, however, does not seem less laden for it.

As cute as the little rascals might be, and as willing I am to share the wealth, it is time to put the ripe fruit to good use. Plum jam is always an option, but I am rather partial to vlaaien, the Limburg version of tarts or pies. And seeing as how this afternoon I am expecting company for coffee, a plumb tart or pruimenvlaai seems to be just the ticket!

Limburg vlaaien use a rich yeast dough for the base of their tarts and pies instead of a flaky crust. It is reminiscent of the fact that these particular pies originated from the leftovers of bread dough at the bakery, and at home. The last remaining pieces of dough would be rolled out, flattened and covered with jam, pieces of fruit or sometimes even just a sprinkle of sugar.

The province of Limburg has a large variety of vlaaien, from sweet and tangy (apricot) to rich and creamy (rice), and just about everything in between. The traditional black plum tart, zwarte pruimen vlaai, is made with dried Italian plums, or prunes, and was made during wintertime when fresh fruit was not available. But since this is (late) summer, and plums are abundantly available, we'll make a fresh plum vlaai instead.

As for Dutch plums, there aren't many, which might explain why there is a distinct lack of plum recipes in the many Dutch cookbooks from the last century. Some varieties are Vroege Tolse, Eldense Blauwe, Reine Claude van Schouwen, and the Dubbele Boerenwitte that was mentioned as early as 1790 in J.H.Knoop's "Pomologie of Kennisse der Vruchten" publication. If you have space for a fruit tree, it might be fun to plant one of these Dutch varieties!

Pruimenvlaai
1/3 cup milk and 2 Tbsp (100 ml), lukewarm
1 1/2 teaspoons (5 grams) active dry yeast
1 3/4 cup (250 gr) all-purpose flour
2 Tablespoons (30 grams) sugar
1/2 teaspoon (4 grams) salt
1 egg
1/2 stick butter (55 gr), soft at room temperature

For the filling:
1 package vanilla pudding, prepared with half the amount of liquid
About 15 ripe plums, washed, pitted, and quartered.

Dissolve the yeast in the warm milk, and let it proof while you measure out the rest of the ingredients. Add the flour to a mixing bowl, sprinkle the sugar on top and give it a stir. Now pour the milk with the yeast on top and start mixing. As the dough comes together, add in the egg and a bit later the salt. Add the soft butter and let the whole mixture come together while you need it into a soft dough. (You may need to add a tablespoon or two of milk in case the dough turns out to be a bit dry).

Form the dough into a ball, put it in a bowl, cover and let it rise.

In the meantime, make the filling. You could use a package of vanilla pudding to make it easy on yourself but if you have the time, try making this pastry cream - half the recipe will do.

Grease a large pie pan (11 inches/28cm), or vlaaivorm, and roll out the dough into a large circle. Transfer it to the pan, and cut off any excess dough you may have. Poke holes in the dough so that it doesn't seize up while baking. Pour the vanilla pudding or pastry cream on top, then arrange the quartered plums. Bake at 400F/200C for 25 minutes - sprinkle a tablespoon of sugar over the plums and bake for another five minutes. When you take the vlaai out of the oven, sprinkle another tablespoon of sugar over the fruit and let it cool.

It's great served by itself, with a big dollop of whipped cream or, the American way, with a scoop of ice cream!


Amandelbroodjes

The month of December could just as well be called "almond month". It's when specialties such as gevulde speculaas, banketletter, banketstaaf, and kerststol show up in bakeries and cafés, and at coffee time with friends or family. For many, these Dutch pastries and breads signify the welcome arrival of the winter festivities, such as Sinterklaas and Christmas.

These baked goods all have almonds in common: they're filled with the sweet, slightly sticky substance called "amandelspijs" or almond paste, that is so loved by many. Almonds have been part of our baking history for many centuries: the earliest Middle Dutch cookbook "Wel ende edelike spijse" already mentions a variety of almond dishes, such as almond butter and almond bread porridge. It seems that we developed a sweet tooth and a craving for almonds early on!

Today's pastries are called "amandelbroodjes". These almond filled treats used to be so popular that a Protestant church in The Hague sold them by the thousands to finance their new chapel! Its name literally translates to "almond rolls", but they're hardly rolls. They're more like the apple turnovers, or appelflappen, that we're familiar with. The good thing is that they're easy to make, and quick to bake. The bad news is that they'll disappear in no time, as they are absolutely delectable. It's hard to deny yourself the pleasure of biting into a warm piece of banket!

Amandelbroodjes
1 lb (450 grams) almond paste
or
8 oz* (225 grams) slivered almonds
8 oz (225 grams) sugar
1 teaspoon almond essence or extract
1 large egg
Zest of 1/2 lemon

8 squares of puff pastry (approx. 5x5 inches/12 x 12 cm)

Coarse sugar

Divide the almond paste into 8 equal pieces. If making your own paste for the recipe, add the almonds, the sugar, the almond essence, one large egg and the lemon zest to a food processor, and pulse repeatedly until the paste comes together. It should be sticky but stiff, and you should still be able to see itty-bitty pieces of almond and sugar crystals.

Preheat the oven to 400F (200C). Take each piece of almond paste and roll it into a small log. If it sticks, sprinkle a little bit of powdered sugar over it. Lay out the pieces of puff pastry on your counter. Brush the inside of the puff pastry with a little bit of water, and place each log slightly to the right of the middle (see picture above). Fold the dough over so that the long ends meet, and pinch the dough together or use a small fork to push the tines into the dough and sealing it. Brush a little bit of water on the top of the turnover and dip it into the coarse sugar.

When all turnovers have been filled and folded, you can place them in the fridge until you are ready to bake. Place them on a baking sheet lined with parchment paper or a silicone baking mat and cover with plastic so they don't dry out. You can wrap and freeze any leftover almond paste. 

Bake for 20 minutes, or until the tops are golden and puffy. No worries if they look too big, the dough will slightly collapse as it cools!

Almond paste gets really, really hot, so don't bite into a hot amandelbroodje just yet.....let it cool until warm to the touch - that's when they're at their best!


* Volume ounces are different than weight ounces. A full measuring cup of 8 volume ounces does not necessarily equal 8 weight ounces: imagine the difference between a cup of feathers and a cup of lead! The ounces for this recipe are by weight, not by volume.  

Appelkruimelvlaai

It's not quite fall yet, but our local orchard is already announcing the ripeness of their first apples. We pick varieties as they ripen, so towards the end of the month, we always end up with a couple of apples of each flavor. Some are sweet, some are tart, some hold up well in the oven and others become jammy and tender. I don't mind as it's a perfect mix for apple pie!  

Vlaai, a broad and flat yeast dough pie, is originally from the province of Limburg. During the weekly bread baking duties, women would often flatten out a piece of leftover bread dough and cover it with slices of fresh fruit or a ladle of sweet jam, so that they had something to eat with their coffee (and you know how much we like our coffee time!). When the bread baking was delegated to the village baker, who baked and brought it to the house, vlaaien would only be baked for Sunday visits, during village fairs and for the holidays. 

Baking vlaai on Sunday is still a bit of a tradition in the South, and a piece of warm vlaai straight out of the oven is often eaten for lunch, with a cup of coffee or two. Depending on what fruit is seasonal and ripe, you could get apple vlaai, cherry vlaai or plum vlaai. If there was no fruit to be had, or it was a special occasion, sometimes you'd get kruimelvlaai, a sweet custardy vlaai with crunchy streusel on top. 

Today's vlaai, appelkruimelvlaai, or apple crumble vlaai, is similar to the Dutch apple pie that many are familiar with, albeit it with less sugar. The natural flavor of the apple is allowed to shine through, and because you only bake it for 25 to 30 minutes, some of the apple still has a bit of a bite. Fantastic!

The vlaai dough is easy to make. The average vlaai pan is 11 inches (28 cm) wide and a little over 1 inch (2.5 cm) high, but any similar size will do,  so don't let that hold you back!

Appelkruimelvlaai
For the dough
1/3 cup milk and 2 Tbsp (100 ml), lukewarm
1 1/2 teaspoons (5 grams) active dry yeast
1 3/4 cup (250 gr) all-purpose flour
2 Tablespoons (30 grams) sugar
1/2 teaspoon (4 grams) salt
1 egg
1/2 stick butter (55 gr), soft at room temperature
2 tablespoons breadcrumbs or panko

Dissolve the yeast in the warm milk, and let it proof while you measure out the rest of the ingredients. Add the flour to a mixing bowl, sprinkle the sugar and salt on top and give it a stir. Now pour in the milk with the yeast and start mixing. As the dough comes together, add in the egg and the soft butter and let the whole mixture come together while you need it into a soft dough. (You may need to add a tablespoon or two of milk in case the dough turns out to be a bit dry).

Form the dough into a ball, put it in a bowl, cover and let it rise. In the meantime, make the filling.

For the filling*
4 to 5 large apples, various flavors
1 tablespoon lemon juice
3 tablespoons (50 grams) sugar
1/2 teaspoon cinnamon
3 heaping tablespoons (30 grams) cornstarch
2 tablespoons panko

For the topping
1 cup (150 grams) all purpose flour
1 stick butter (110 grams), cold
1/2 cup (100 grams) sugar

Peel and core the apples, then cut into dice. Slices are okay too, but for this pie I like the cubes, they add a bit of texture. Toss the apples with the lemon juice, the sugar, cinnamon and the cornstarch. Keep the panko aside until you are ready to assemble the vlaai.

Grease your pie pan, or vlaaivorm, and roll out the dough into a large circle. Transfer it to the pan, and cut off any excess dough you may have. Poke holes in the dough so that it doesn't seize up while baking, cover and let it rest while you make the kruimeltopping.

Cut the butter for the topping into small pieces. Mix the flour and the sugar in a bowl, and rub the butter between your fingers in the flour. I tend to put flour and butter between the palms of my hands and rub them together (I have no patience!) until the mixture resembles wet sand.

Heat your oven to 400F/200C. Sprinkle the panko on top of the dough (this prevents too much juice going into the dough and making it soggy). Pour the apple mixture on top of the vlaai dough, flatten it out a bit and then top with the crumble. Bake in the oven for 25 minutes, and check to see if your kruimeltopping is browning. If it's not already golden, give it five more minutes and then finish it under the broiler for a nice golden color. Do not walk away at this point, these broilers are fast!!

Let the vlaai cool so that the filling can settle, cut into generous pieces and enjoy it by itself, with a dollop of whipped cream or a la mode, with a big scoop of ice cream.


*If you would like, you can add raisins, currants, boerenjongens or boerenmeisjes to the filling.


Aardbeienjam

Strawberries, or aardbeien, are a welcome sign in early summer. The moment the first crate of these zomerkoninkjes (called King of Summer because of its little green crown) hit the market, you'll see strawberries in everything: on beschuit, on fresh fruit tarts, or on slices of fresh, white, buttered bread if you're lucky!

The actual natural strawberry season only lasts for a good five to six weeks, from early June until mid July, but the Netherlands is able to produce about 20 million pounds a year because of their ingenious greenhouse and plastic tunnel systems. It keeps us in strawberries practically year round, except for the first two months of the year, when the runners are being refrigerated for up to 10 weeks before being put in the soil. The strawberry that is most popular in Holland is the Elsanta variety.

It goes without saying that strawberries freshly picked in the field, that are still a little warm from the sun, are hands-down the best for eating fresh. So if you're growing your own, or have the chance to get your hands on some, enjoy them while you can! If you are not able to get around to eating all of them immediately, but don't want them to go to waste, making a quick jam* is a second option.

If you find yourself in the country during this time of year, you may enjoy visiting Het Aardbeienland, a small theme park in Limburg. Its main focus is, you guessed it, strawberries! There is plenty of opportunity to pick your own, learn about new and heirloom varieties, have the kids play in the playground or walk around the Strawberry Forest.

Aardbeienjam
1 lb strawberries, hulled and chopped
1/3 cup sugar
1 tablespoon lemon juice
1/3 cup water
1 tablespoon pectin powder

Add the strawberries, sugar, lemon juice and water to a small saucepan. Bring the pan up to heat, and let the mixture simmer for about twenty minutes, on low, until the fruit is soft. Mash with a fork or potato masher. Stir in the pectin, bring up to a boil and stir for a whole minute, then take off the stove and let it cool. Pour the jam in a clean container and refrigerate*. Eat within two weeks.

*This jam is meant for quick consumption and is not to be stored outside of the fridge, or for a long period of time. If you wish to omit the pectin powder, just continue to simmer the jam until it's thick. If you wish to preserve the jam for shelf, or long life holding, please follow canning instructions for your area (depends on high altitude) and from an approved source: either your local Extension office or here. If the jam shows any sign of spoilage (mold, acetone smell) please discard the jam immediately. Food safety is key: it's not worth sacrificing a couple of dollars or your family's health for. I will be doing a proper canning article later in the year. 


Broodje Gezond

What a busy summer! We're gardening, pulling weeds, and trying to watch the World Cup all at the same time. With all these activities, it's often too late to cook, or too hot, or I am just too busy. Perfect occasion for that all-time favorite cold sandwich; the broodje gezond ! It's apparent that we love our fruits and vegetables, whether we grow them ourselves or not. Apart from being the main focus of our hot meals (when Dutch kids ask what's for dinner, the answer will be whatever vegetable is served that night!), we also love to add them to our sandwiches. The Dutch love their bread, and two out of the three meals a day consists of those lovely carbs.

A real summer treat is fresh sliced aardbeien, strawberries, on buttered slices of white bread, with a sprinkling of sugar on top! My mom would have those ready for us when we came out of school, with a cup of tea. Another way to get your five-a-day is to slice some fresh cucumber, apple or banana on a peanut butter sandwich (with or without sambal), sliced radishes on rye bread with cream cheese, and pineapple on your tosti. Every family just about has their own favorite combinations!

One of the best ways to get your veggie sandwich in, is by ordering, or making your own, broodje gezond. This literally translates as "healthy roll" or "healthy sandwich", and is one of the most popular choices for a bite on-the-go. These lunch broodjes are often made with white or whole wheat rolls, and are filled with ham, cheese, lettuce, tomato, boiled egg and cucumber slices. If you’re up for it, you can bake your own multigrain rolls, or get some tasty crunchy rolls from your bakery.

Best of all, these sandwiches are easy to make, are filling, and leave you with plenty of time to do other things: gardening, pulling weeds, watching the World Cup...

Broodje Gezond:

Slice a roll in half and butter both sides (leave the mayo for the fries, Dutch bread gets butter!).
Layer lettuce, tomato, cheese and/or ham, boiled egg and cucumber on the bottom roll.
Sprinkle some salt and pepper on the toppings if desired.
Cover with buttered top.
Bite. Chew. Marvel. Repeat :-).

Have a great summer!!!


Meergranenbroodjes

Bread plays an important role in Dutch food. Holland, or the Netherlands, is one of the largest bread consumers of Europe, purchasing about 120 lbs of this fantastic fare per year. Many a tourist, when stepping inside a Dutch bakery, grocery store or sandwich shop, is surprised by the large amount of bread varieties and toppings to choose from. But for a country where two out of three meals mainly consist of bread and bread toppings, the variety is not so much an option as a necessity. 

These two meals (usually breakfast and lunch, although some families will eat a warm lunch and consume their second bread meal at dinner time) will generally contain a variety of breads, with white and whole grain breads as the most common choices at the table. This is not by accident.....bread meals tend to consist of two servings: a slice of bread with a savory topping such as cheese or cold cuts is eaten first, the second serving usually consists of a sweet spread, and finishes the meal, so to say. Besides the standard sliced white or brown (i.e. whole wheat) loaf, a large selection of rolls, luxury breads and crispier options such as beschuit and knäckebröd is also available. 

The Dutch are well-known for their large variety of breads: all variations of wheat are represented, the whole gamut from white to whole wheat, rye, malt and sourdough. Ancient grains such as spelt and emmer have made a fabulous comeback. And not many countries have as many bread toppings as the Dutch do, ranging from sweet to savory and just about everything in between, which makes eating a bread meal interesting and tasty! Where else but in Holland can you put chocoladehagel, chocolate sprinkles, on your bread without anybody raising an eyebrow?!  

Beside white rolls and Dutch crunch, a popular roll is the multigrain roll, or the meergranenbroodjes. A favorite choice for weekend brunches, these rolls are usually eaten with savory toppings, such as cheese or ham. They are also a favorite for that other ubiquitous sandwich, the broodje gezond, the healthy sandwich. 

Meergranenbroodjes
2 tablespoons barley malt syrup
1 ½ cup (350 ml) warm water
3 tsp (10 grams) active dry yeast
1 cup (150 grams) bread flour
1 cup (150 grams) whole wheat flour
1 cup (125 grams) rye flour
½ cup (40 grams) barley flour
2 tablespoons sunflower seeds
2 tablespoons flax seed
2 tablespoons rolled oats
2 teaspoon salt

Topping
1 tablespoon sunflower seeds
1 tablespoon rolled oats
2 tablespoons flax seed

Dissolve the two tablespoons barley malt syrup in the warm water, and sprinkle the yeast on top to proof. While you wait, mix the different flours together with the salt. When the yeast has proofed, stir it into the flour and mix until the dough comes together, knead for a good five to six minutes to develop the gluten. Pat the dough out, sprinkle the seeds on top, give it a knead or two to distribute the seeds, then form the dough into a ball. Rest in a greased bowl and cover. Allow to rise at room temperature until double its size, approximately 40 minutes.

Punch down the dough,  and roll back into a ball. Dust the counter with a little bit of flour and relax the dough, covered, for about ten minutes. In the meantime, put parchment paper or a silicone mat on a baking sheet, and mix the seeds for the topping. Place them in a shallow plate. Carefully roll the dough into a circle, about seven inches wide. Use a dough cutter or a sharp knife to divide the dough into 8 wedges, much like a pie. Brush the top of each wedge with a little bit of water, then dip the wet top into the seeds. Repeat with each wedge. Lay the rolls on the baking sheet, with enough space to expand. Cover and let rise for thirty minutes.

Heat the oven to 425F. Bake the rolls for 20 minutes or until they reach an internal temperature of 195F.

Makes 8 rolls.


Amazon Prime Shopping Suggestions: 

Disclaimer: if you buy through any of the links in the Amazon Prime Shopping Suggestions section, the Amazon Services LLC Associates Program will pay us a small commission on qualifying purchases. It does not increase your cost or price, and it will help us keep the website running. Your support is very much appreciated! 

Don't have Amazon Prime but want to give it a try? This link offers a 30 day trial.