Tomatenschoteltje

There is an abundance of "schoteltje" recipes in our traditional kitchen, like "broodschoteltje", "macaronischoteltje", "beschuitschoteltje", "rijstschoteltje". It appears to be a collective name for predominantly sweet dessert dishes, but not always, like today's savory dish. 

I don't really have a good translation for the "schoteltje" part. Schoteltje literally means "small dish". The recipes themselves fall somewhere between small casseroles, au gratin dishes, or cocottes - but they're not always a full-blown casserole, which would imply cooking for a lengthy time in the oven using raw ingredients (because that would be an "ovenschotel", an oven dish), and not all recipes require gratin, and sometimes cocottes are initially meant to contain personal servings, which also doesn't apply. So for now, I am going with the unsatisfactory English name of "dish". Maybe you can help me come up with something better? 

Most schoteltje recipes are generated straight out of our frugal tendencies: they use up old bread, leftover rice or pasta, even oliebollen, and often incorporate eggs, a food that is still affordable for most. So too this recipe, that uses up a glut of tomatoes, a handful of leftover shredded cheese, and a few eggs.

This recipe is a great lunch or brunch dish: tomatoes stuffed with cheesy scrambled egg, topped with bacon, and baked in the oven until the skin and flesh of the tomatoes softens and become jammy. Together with a green salad, or a few slices of bread or toast, it's a satisfying meal, and an affordable one. 

Tomatenschoteltje

4 large tomatoes
5 eggs
1 cup (100 grams) shredded cheese
4 strips bacon
Butter
Salt
Pepper
Herbs (optional)

Cut the top of the tomatoes, and put the caps aside for now. Hollow the tomatoes out with the help of a spoon. Save the seeds, or puree the tomato pulp and save it for soups. Sprinkle a little bit of salt on the inside of each tomato, and place it upside down in the dish. In the meantime, crack the eggs and whisk them, then melt the butter in a skillet. Add the egg mix, and when it starts to set, scramble the eggs with the cheese. Season with salt and pepper and herbs, if desired. Don't overcook the eggs.

Heat the oven to 400F/200C. Turn the tomatoes right side up, stuff them with the scrambled eggs, and top each one with a strip of bacon. Replace the cap, add a little bit of water to the bottom of the dish, and bake the tomatoes for 20 - 25 minutes, until the caps are slightly shriveled and the tomatoes are starting to burst. 

Serve warm, with toast, or a green salad. Eet smakelijk!


Why can't I print your recipes???

Every now and then I get that question. It's usually accompanied by three or four question marks or an angry face. I've alluded to the reason in previous posts, but after another angry message last week, I figured I better put my reasons in a post, so you all know where I stand. I fully expect to lose some readers over this, but I also feel that it is important that you understand my reasoning, and perhaps are inspired by it.

When I started The Dutch Table, my vision was to have it as a recipe repository, with stories about our food traditions and history, something to reach for when memory would fail me. Now, after fifteen years, I think I have accomplished that. Thousands access the website for recipes, they read the stories and sometimes leave comments or send emails. Our readers are not only Dutch people, but also people who had Dutch parents or grandparents, aunts or uncles, or partners.

It wasn't long after starting the website before I began to receive emails from readers, asking for help with finding recipes that they could only vaguely remember, or that their parents reminisced over. Sometimes they didn't remember the name, or the way it looked, but we'd start with the little they did remember. Over the years, I have amassed a significant amount of books about our food traditions, but also about Dutch housekeeping, gardening, preservation, folklore and oude ambachten, ancient skills and crafts. All these, plus searching in online newspapers, advertisements, journals and handwritten notes, would often provide a solution. The joy it would bring was well worth all the effort, because it's never just about the food, is it? It's about the memories it brings, the joy of remembering loved ones, and recreating or preserving traditions. 

As a small business owner, my content is not only my livelihood but also a part of my personal creative expression. Having it freely printable makes it challenging to manage and protect my work. More importantly, I believe in the charm and tradition of handwritten recipes. There's something special about a recipe that's been copied down by hand, perhaps with personal notes and adaptations, and then passed on. It's a way of making each recipe your own and creating a legacy that can be handed down through generations.

It's not that you can't print the recipes. It's a simple right click on the page, select the print option, enter the amount of pages and hit the button. Nevertheless, I encourage you to take the time to write down by hand the recipes you love. This not only helps support my website and the work I put into creating these recipes, but it also allows you to add a personal touch that printed pages just can't capture. Write them down, perhaps in a notebook (see below) or on recipe cards, and add your personal notes and memories about it: how and when it was served, what dishes or utensils you would use, who loved the dish and who didn't, and any other memory you have associated with it. Doodle in the sidelines, wipe away a splash of sauce, and keep it handy in the kitchen. Because ultimately, a recipe online is easy to find, but it's the cherished treasure of your handwriting and personalization of it that adds all the value.  

I hope you understand my perspective and continue to enjoy the recipes! 

Thank you for keeping our culinary heritage and traditions alive, and for your support always.

Nicole

Notebooks

I put these blank notebooks (120 and 200 lined pages) together with some of my favorite vintage Dutch images. You can see the selection here, If you buy through this link, the Amazon Services LLC Associates Program will pay us a small commission on qualifying purchases. It does not increase your cost or price, and it will help us keep the website running. Your support is very much appreciated!


Bitterkoekjes

Almonds have a prominent place as an item of luxury in the baked goods of the Netherlands. One of our oldest cookery books, Een notabel boecxken van cokeryen (A Remarkable Book on Cooking) published around 1514 by Thomas van der Noot in Brussels, already contains several almond based recipes. Christmas stollen are enriched by having a ribbon of almond paste running through its middle, speculaas is enhanced by adding a layer of almond paste inbetween, and numerous cookies and pastries contain almonds in various ways. 

So too today's cookie, the bitterkoekje, bitter cookie, so named after the bitter almonds that were traditionally used in its recipe. In a different book, this one from 1832, it said that "cookies made from bitter almonds" were shared at weddings to symbolize the ups (sweet) and the downs (bitter) of marriage. What a pity that this custom is no longer practiced! 

Bitterkoekjes are crispy on the outside and slightly chewy in the middle, and are made with the basic ingredients of ground almonds, powdered sugar, and egg white. The bitter flavor comes from pure almond extract. so check your extract to make sure it lists "bitter almond oil" in the ingredients.  Because they don't contain any flour, these cookies are also a good gluten-free option. If you choose almond flour instead of grinding your own, read the ingredients list to make sure there are no other additives.

Bitterkoekjes
1 cup (150 grams) powdered sugar, packed
1 1/2 cup (150 grams) finely ground almonds 
Pinch of salt
1 teaspoon pure almond extract
2 eggs, egg whites only, divided

Line your baking sheet with a double layer of parchment paper. Heat the oven to 375F/190C. Sift the powdered sugar. Mix the almond with the powdered sugar, the salt, the almond extract, and one egg white until it's well mixed. Add a little bit at a time of the second egg white until you have a consistency that can be piped but is not too liquid that it will spread on its own - look at the picture to the right for an example of consistency. 

Pipe marble sized dollops onto the baking sheet (or use a tiny ice cream scoop, or two small spoons) leaving a little bit of space between. Bake for 10 - 15 minutes, but check the color after 10 minutes. Because of the high sugar content, these tend to go from light golden to dark brown in no time, so keep checking! Makes approx. 60 small cookies.

Cool on the paper on a rack, and when they're cooled, peel them off the paper. Keep in a tin. As time passes they will get hard if you're in a dry climate - a slice of bread in the tin will help soften. 


Amazon Prime Shopping Suggestions: 

Disclaimer: if you buy through any of the links in the Amazon Prime Shopping Suggestions section, the Amazon Services LLC Associates Program will pay us a small commission on qualifying purchases. It does not increase your cost or price, and it will help us keep the website running. Your support is very much appreciated! 

Don't have Amazon Prime but want to give it a try? This link offers a 30 day trial. 

Amandelspijs

Photo by Tetiana Bykovets 
on 
Unsplash
It's hard to say when almonds made their entrance into the Dutch kitchen. In Europe, almonds appear in recipes from the late Middle Ages (from 1300) on, often in combination with honey, and spices from Asia. These products came with traders from the Middle East during the Crusades. The oldest Dutch recipes for almond recipes (particularly marzipan) date from the beginning of the 17th century.

Almonds are still a big component of our baking traditions, mainly during the various holidays such as Sinterklaas and Christmas, where it makes its appearance next to speculaas, flavored with a tantalizing combination of spices such as cinnamon, ginger, nutmeg, coriander, and ginger, and as a core in the traditional Kerststol, the Christmas bread. During the rest of the year, we see it appear in gevulde koeken, (almond paste filled buttery cookies), amandelbroodjes (almond paste turnovers), rondos, and as an optional base for apple and pear cakes.

Because almond paste tends to be fairly expensive, the commercial baking sector also employs something called "banketspijs" - made white beans and almond extract. If you are buying almond flavored products, read the label to see if you're getting almonds or beans. Both have pros and cons. 

This recipe is for a batch of almond paste, and is easy to remember: the same weight of almonds and sugar, mixed with an egg, lemon zest, and a splash of almond extract, if you want to boost the almond flavor a bit. It holds fairly well in the fridge for about a week to to ten days. Make sure to use clean utensils when taking paste out of the container for recipes, and return it to the refrigerator as soon as you're done. 

Amandelspijs

2 cups (250 grams) almonds, blanched and chopped*
1 1/4 cup (250 grams) sugar
1 egg
Zest of a small lemon
Almond extract (optional)

Blend the almonds and the sugar together in a food processor or blender until well combined, like wet, fine sand. Add in the egg, the lemon zest and, if desired, a tablespoon of almond flavoring. Mix everything together into a thick paste. Store in a covered container in the fridge.

*nowadays it's easier to find almond flour or almond meal. Read the label to make sure the only ingredient are almonds. 


Amazon Prime Shopping Suggestions: 

Disclaimer: if you buy through any of the links in the Amazon Prime Shopping Suggestions section, the Amazon Services LLC Associates Program will pay us a small commission on qualifying purchases. It does not increase your cost or price, and it will help us keep the website running. Your support is very much appreciated! 

Don't have Amazon Prime but want to give it a try? This link offers a 30 day trial. 


Slagroomwafels

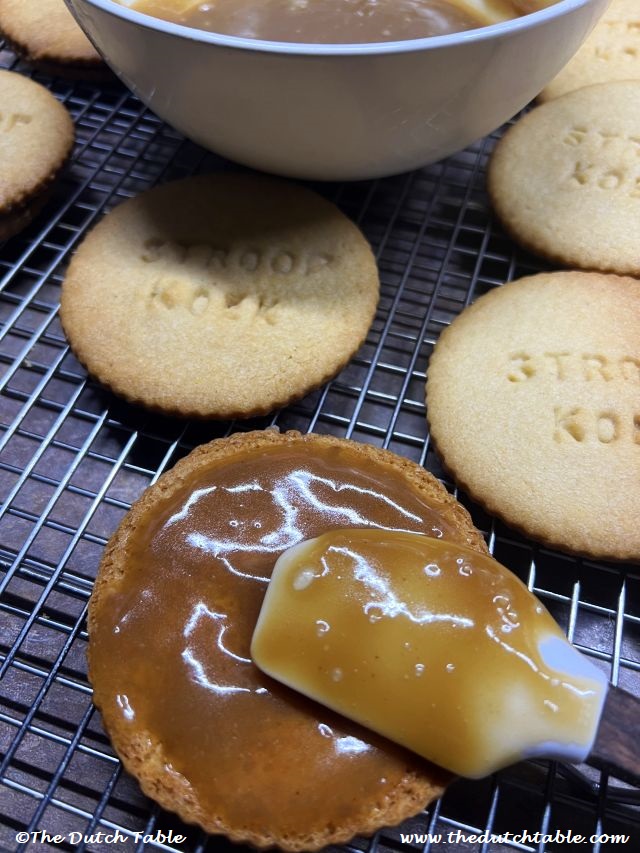
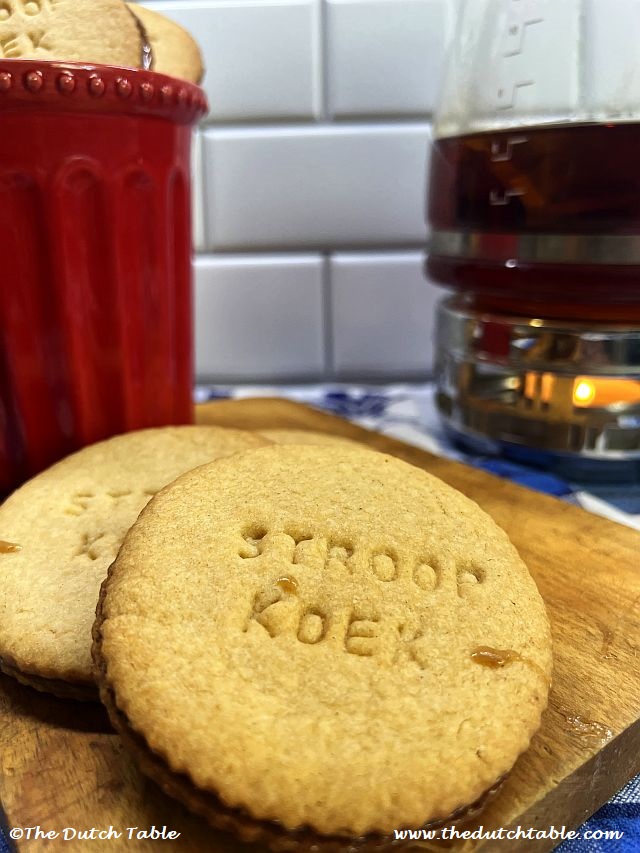
 Every now and then, when looking for new recipes in my Dutch cookbooks, memories flood back when I see a name or an ingredient. Other times, it happens when readers like you comment on the recipes or posts, either on Facebook or Instagram. So too last week, when I posted the recipe for stroopkoeken, a reader mentioned that their favorite cookie was not so much a stroopkoek, but a slagroomwafel, a whipped cream waffle. The moment I read the comment I was straight back in my childhood, standing next to my grandpa Tinus, at the little window of the ice cream shop in town. I loved getting the little square waffle cone, topped with a big swirl of soft serve ice-cream. It fit right in my little fist. My grandpa, who had as much of a sweet tooth as I have, would sometimes get a 
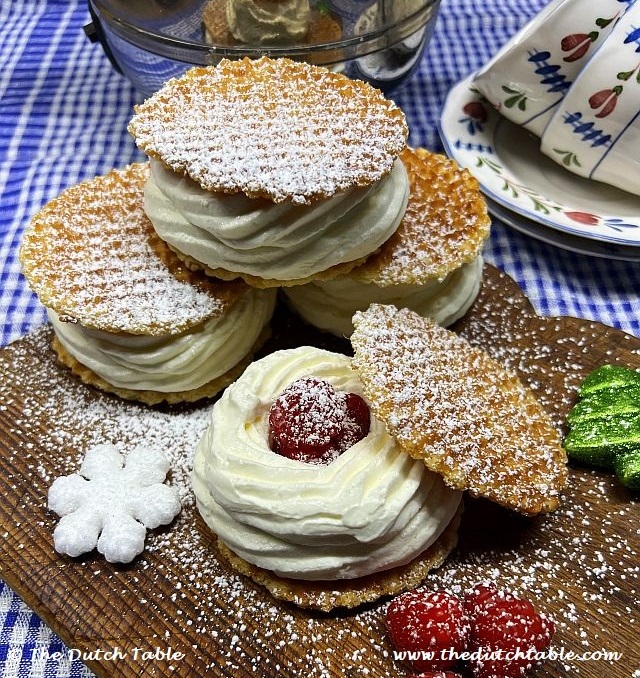
slagroomwafel: a big, round crispy waffle, topped with what seemed to me a massive amount of freshly whipped cream, and sandwiched with another waffle. It was a messy endeavor, but oh boy.....worth every dribble on his shirt by the look on his face!

There is not much known about slagroomwafels: just two crispy sweet waffles sandwiched together with a huge dollop of freshly whipped cream. I've found references to it going back as early as 1917 - but no recipes, regional references, or specific holidays or celebrations that it belongs to. Both ingredients are standard fare at the ice cream shops: crispy waffles for ice-cream waffles (one or two big scoops of ice cream between two waffles), and freshly whipped cream to go on top of ice cream sundaes, so often slagroomwafels are also on the menu. A few bakeries will include slagroomwafels in their repertoire, but it's not very common anymore. 

Which is a shame really, because the combination of sweet whipped cream and a crispy waffle truly is delightful. Messy, but delightful. And what's even better is that, because it's so "plain", if you will, and there are no specific details about how and when to make them, this recipe lends itself to personal adjustments. Prefer to flavor the waffle with speculaaskruiden? Go for it! Want to fold chopped strawberries into the whipped cream? Do it! 

For this recipe, I tried a few things: I served the cream directly on the waffle (for eating, it's best to pull the two waffles apart and share the slagroom between the two of them ). I also piped whipped cream in circles on a baking sheet lined with parchment paper, froze them overnight (now you have an ice cold treat) and assembled the waffles shortly before sharing them, adding raspberries in the center. 

Lastly, I piped whipped cream on a waffle, added raspberries, topped it with another waffle, and froze the whole thing overnight. To my surprise, the waffles stayed crispy. So plenty of options to try! 

For this recipe, I used my trusted Palmer Electric Waffle Iron. The recipe makes approx. 16 single waffles. For more shopping recommendations, scroll to the bottom of the page.

Slagroomwafels

For the waffles
1 cup (150 grams) all-purpose flour
3/4 cup (150 grams) sugar
6 Tbsp (60 grams) butter, melted and cool
1 egg
1/2 tsp vanilla extract
Pinch cinnamon 

For the whipped cream
2 cups (475 ml) whipping cream
1 cup (120 grams) powdered sugar

Decoration
1 tablespoon powdered sugar
Fresh fruit (optional)

Mix the flour with the sugar, then stir in the melted butter, the egg, the vanilla and the optional cinnamon. Knead into a cohesive dough, remove from the bowl, roll into a sausage shape. Cover with plastic, or put in container, and refrigerate for at least an hour. 

Heat up your waffle iron according to the manufacturer's instructions. Remove the dough from the fridge, and divide it into 1 oz (approx. 25 grams) pieces, then roll each into a ball. 

Bake your waffles until they are golden. The time will differ between irons so you will just have practice a little bit. Remove the waffles when they are done, with a flat, broad implement (I use my cheese slicer) because they will still be soft when hot, but will harden as they cool, so lay them flat on a rack to cool off. 

Whip the cream in a cold bowl until soft peaks, sieve in the powdered sugar, and continue to whip until stiff peaks. Fill a piping bag with a star tip. Pipe a large double circle on a waffle, add fresh berries in the middle (optional) and top with another waffle. Dust with powdered sugar.

You can serve them directly, or freeze them for later. If you have any whipped cream left over and no immediate use for it, you may want to try and pipe big dollops on a baking sheet, and freeze them. They make a great last minute addition to a hot cup of coffee or chocolate! 


Amazon Prime Shopping Suggestions: 

Disclaimer: if you buy through any of the links in the Amazon Prime Shopping Suggestions section, the Amazon Services LLC Associates Program will pay us a small commission on qualifying purchases. It does not increase your cost or price, and it will help us keep the website running. Your support is very much appreciated! 

Don't have Amazon Prime but want to give it a try? This link offers a 30 day trial. 

Stroopkoeken

The traditional stroopwafel, hailing from the city of Gouda, has quickly taken the world by storm. Whereas a few years ago it was still difficult to find a decent stroopwafel in town, they are now available just about everywhere. No self-respecting coffee house can be found without!

It's all the same to me. I am not very fond of the stroopwafel (how very un-Dutch of me!). It's too sweet, too sticky, and there just isn't enough wafel to hold all the stroop. Luckily for me, and others who prefer to bite into a buttery, crumbly cookie instead, somebody in Gouda invented the Punselie: a stroopwafel made from cookies. 

Here is what happened. A young man by the name of Johannes Punselie started a bakery in Gouda around 1872-1873. He specialized in making various cookies, among which the famous Goudse Mop, and the Gouds Ruitje: a buttery cookie with a diamond pattern. At some point, his son Bertus took over, and this is where it gets interesting!

History has it that the members of the church choir would each get a stroopwafel as compensation for their singing. However, in 1945, because of money struggles (we were just coming out of the war), the sextant at the church was no longer able to treat his choir. Bless Bertus Punselie, who decided to take two Goudse Ruitjes, glue them together with stroop, and hey presto! the stroopkoek was born. Or in this case, the Punselie, as Bertus did not hesitate to name the invention after himself. How exactly the sextant was able to pay for them, or if Bertus provided them for free, I was not able to track down. 

I'm sure they figured it out somehow. In the meantime, grandson Ronald is currently heading up the company, which produces 40,000 biscuits per hour (yes, you read that right, per HOUR!), and the bakery/factory is still located in the middle of the city. 

From my kitchen, I don't plan to get even close to that kind of production! I made 16 stroopkoeken,  all within a fairly short amount of time. This may be a great addition to your baking repertoire, or a fun gift for the upcoming holidays! Stroopwafels are so last year....let's hone in on the stroopkoek!

Stroopkoeken
For the dough
2 sticks butter + 2 tablespoons (250 grams), room temperature
1 scant cup sugar (180 grams)
3 1/4 cups AP flour (400 grams)
2 teaspoons baking powder
1 egg
pinch of salt
1 teaspoon speculaaskruiden (optional, and not traditional - but so tasty!)

For the stroop
1/3 cup pancake syrup (100 grams)
1/4 cup brown sugar (60 grams)
3 tablespoons butter (40 grams)
1 teaspoon cinnamon (if not using spices in dough)

Cream the butter and the sugar until white and fluffy. Add in the flour, the baking powder, the egg and a pinch of salt and the spices (optional), and blend it into a pliable dough. Remove it from the bowl, roll it into a ball or a sausage, cover with cling film or place it in a container, and let it rest in the fridge for at least an hour, better overnight but not necessary.

Melt the ingredients for the stroop in a small pot on the stove, until the sugar has dissolved. Do not overheat, it's better to go low and slow. Pour the syrup in a container, and refrigerate. Also best left overnight, but it definitely has to be cold before using. 

Preheat your oven to 350F/175C. 

Line your baking sheets with parchment paper or a silicone mat. Roll out the dough, about 0.1 inch (3 mm) thick, and cut out large circles, approx. 8 cm (3 inches) wide. Transfer each onto the baking sheets. You can mark the cookies with a fork, or stamp them with letters, like I did. It won't make any difference to the taste so make this your own! 

Bake the cookies golden in 13 - 15 minutes - you may need to turn the sheet trays around to ensure even baking. Cool the cookies on a rack. When cold (the syrup will run otherwise and make a big mess!), pour a heaping teaspoon of syrup on the back of a cookie, spread it with a knife, and press the second cookie on top, flat side down. Repeat this until all cookies are matched. Let them rest for a little bit so that the syrup settles. 

Now it's time to make yourself a cup of tea, grab that book you've been meaning to read, and treat yourself to a tasty stroopkoek, you've deserved it!